Se afișează postările cu eticheta Adafruit. Afișați toate postările

vineri, 14 noiembrie 2014

Ecran tactil de 2,4" (6cm)

English version: 2.4" touch TFT LCD shield


   Am achizitionat de pe ebay un ecran grafic inclusiv partea de touch rezisitv:
   Desi pe vanzatorul indicata o pagina unde s-ar fi aflat librarii utile si sketch-uri, acestea nu au functionat, asa ca am gasit articolul A 2.4″ TFT TOUCHSCREEN SHIELD FOR ARDUINO de pe site-ul http://www.smokeandwires.co.nz/.
   Ecranul de pe shield are driver-ul ST7781 si pentru a-l face functional, cei de la Smoke and Wires au modificat libraria Adafruit-TFTLCD realizand astfel libraria SWTFT. Aceasta librarie lucreaza impreuna cu libraria Adafruit GFX, iar partea de ecran tactil lucreaza cu libraria Touch-Screen, tot de la Adafruit.
   Primul lucru care m-a deranjat este acela ca foloseste aproape toti pinii lui Arduino Uno, liber este doar A5 pe partea de analogic, iar pe digital doar D0 si D1 sunt liberi, care sunt folositi de interfata USB, de fapt. Dintre acestia, 4 sunt folositi pentru cardul SD (D10, D11, D12 si D13), deci as putea face un shield intermediar pentru a putea folosi acesti pini sau sa-i deconectez mecanic (intrerupere circuite), deoarece ma gandeam sa fac un termostat de centrala cu butoane virtuale...
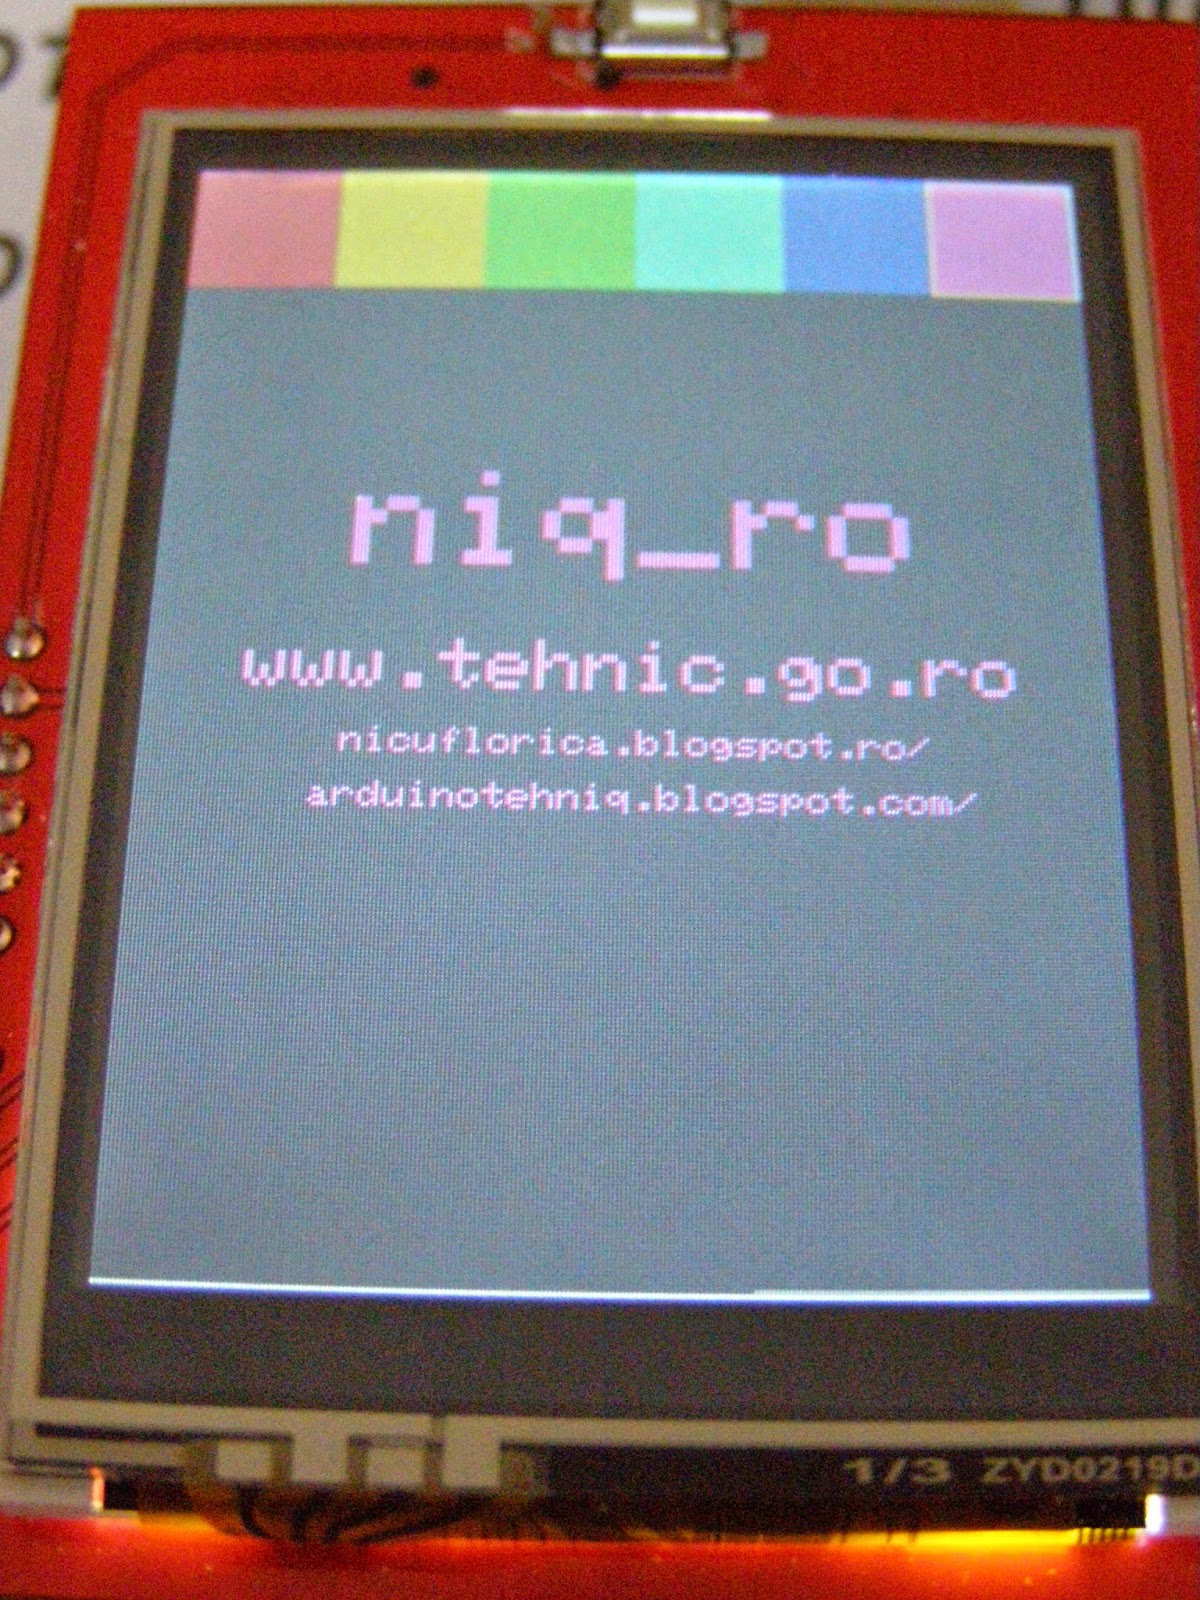
   Prima data am incarcat sketch-urile din exemplele librariei modificate, facand un filmulet numit afisaj color de 2,4" cu touch rezistiv si Arduino
   Am facut si niste poze ale ecranului si a informatiilor de pe el:

   Pentru a intelege sketch-urile si librariile folosite, am inceput sa le fac mici modificari, dupa cum apare in filmuletul afisaj color de 2,4" cu touch rezistiv si Arduino (2)
   Am facut si poze:
   Ulterior, am "intors" ecranul pe "lat" si am obtinut filmuletul afisaj color de 2,4" cu touch rezistiv si Arduino (3)
   Un sketch corectat si cu un buton de stergere in dreapta este:
// Original code provided by Smoke And Wires
// http://www.smokeandwires.co.nz
// This code has been taken from the Adafruit TFT Library and modified
//  by us for use with our TFT Shields / Modules
// For original code / licensing please refer to
// https://github.com/adafruit/TFTLCD-Library

// adapted sketch by niq_ro from http://arduinotehniq.blogspot.com/
// ver. 1m5 - 13.11.2014, Craiova - Romania

#include <Adafruit_GFX.h>    // Core graphics library
#include "SWTFT.h" // Hardware-specific library

// The control pins for the LCD can be assigned to any digital or
// analog pins...but we'll use the analog pins as this allows us to
// double up the pins with the touch screen (see the TFT paint example).
// #define LCD_CS A3 // Chip Select goes to Analog 3
// #define LCD_CD A2 // Command/Data goes to Analog 2
// #define LCD_WR A1 // LCD Write goes to Analog 1
// #define LCD_RD A0 // LCD Read goes to Analog 0

// #define LCD_RESET A4 // Can alternately just connect to Arduino's reset pin

// When using the BREAKOUT BOARD only, use these 8 data lines to the LCD:
// For the Arduino Uno, Duemilanove, Diecimila, etc.:
//   D0 connects to digital pin 8  (Notice these are
//   D1 connects to digital pin 9   NOT in order!)
//   D2 connects to digital pin 2
//   D3 connects to digital pin 3
//   D4 connects to digital pin 4
//   D5 connects to digital pin 5
//   D6 connects to digital pin 6
//   D7 connects to digital pin 7
// For the Arduino Mega, use digital pins 22 through 29
// (on the 2-row header at the end of the board).


#include <Adafruit_GFX.h>    // Core graphics library
#include <SWTFT.h> // Hardware-specific library
#include <TouchScreen.h>


#define YP A1  // must be an analog pin, use "An" notation!
#define XM A2  // must be an analog pin, use "An" notation!
#define YM 7   // can be a digital pin
#define XP 6   // can be a digital pin

#define TS_MINX 150
#define TS_MINY 120
#define TS_MAXX 920
#define TS_MAXY 940

// For better pressure precision, we need to know the resistance
// between X+ and X- Use any multimeter to read it
// For the one we're using, its 300 ohms across the X plate
TouchScreen ts = TouchScreen(XP, YP, XM, YM, 300);


// Assign human-readable names to some common 16-bit color values:
#define BLACK   0x0000
#define BLUE    0x001F
#define RED     0xF800
#define GREEN   0x07E0
#define CYAN    0x07FF
#define MAGENTA 0xF81F
#define YELLOW  0xFFE0
#define WHITE   0xFFFF
//#define ROZ     0xFD20
#define ROZ     0xFBE0
#define GRI     0xBDF7
// http://stackoverflow.com/questions/13720937/c-defined-16bit-high-color
// http://wiibrew.org/wiki/U16_colors

SWTFT tft;

#define BOXSIZE 40
#define PENRADIUS 3
int oldcolor, currentcolor;
int ics; 

void setup(void) {
  Serial.begin(9600);
  Serial.println(F("Paint!"));
  
  tft.reset();
  
  uint16_t identifier = tft.readID();

  Serial.print(F("LCD driver chip: "));
  Serial.println(identifier, HEX);
    

  tft.begin(identifier);

  tft.fillScreen(BLACK);
  tft.fillRect(0, 0, 320, 240, BLACK);
  tft.setRotation(3);
  tft.setCursor(30, 100);
  tft.setTextColor(RED);  tft.setTextSize(3);
  tft.println("LCD driver chip: ");
  tft.setCursor(100, 150);
  tft.setTextColor(BLUE);
  tft.println(identifier, HEX);

delay(2000);
tft.fillRect(0, 0, 320, 240, BLACK);
  
tft.setRotation(0);
  tft.fillRect(0, 0, BOXSIZE, BOXSIZE, RED);
  tft.fillRect(0, BOXSIZE, BOXSIZE, BOXSIZE, YELLOW);
  tft.fillRect(0, BOXSIZE*2, BOXSIZE, BOXSIZE, GREEN);
  tft.fillRect(0, BOXSIZE*3, BOXSIZE, BOXSIZE, CYAN);
  tft.fillRect(0, BOXSIZE*4, BOXSIZE, BOXSIZE, BLUE);
  tft.fillRect(0, BOXSIZE*5, BOXSIZE, BOXSIZE, MAGENTA);
  tft.fillRect(0, BOXSIZE*6, BOXSIZE, BOXSIZE, GRI);
  tft.fillRect(0, BOXSIZE*7, BOXSIZE, BOXSIZE,  ROZ);
//tft.fillRect(BOXSIZE, BOXSIZE, BOXSIZE, BOXSIZE, WHITE);
 
  tft.drawRect(0, 0, BOXSIZE, BOXSIZE, WHITE);
  currentcolor = RED;


 cifre (WHITE);
  pinMode(13, OUTPUT);
}

#define MINPRESSURE 10
#define MAXPRESSURE 1000

void loop()
{
  digitalWrite(13, HIGH);
  // Recently Point was renamed TSPoint in the TouchScreen library
  // If you are using an older version of the library, use the
  // commented definition instead.
  // Point p = ts.getPoint();
  TSPoint p = ts.getPoint();
  digitalWrite(13, LOW);

  // if sharing pins, you'll need to fix the directions of the touchscreen pins
  //pinMode(XP, OUTPUT);
  pinMode(XM, OUTPUT);
  pinMode(YP, OUTPUT);
  //pinMode(YM, OUTPUT);

  // we have some minimum pressure we consider 'valid'
  // pressure of 0 means no pressing!

  if (p.z > MINPRESSURE && p.z < MAXPRESSURE) {
  /*  
    Serial.print("X = "); Serial.print(p.x);
    Serial.print("\tY = "); Serial.print(p.y);
    Serial.print("\tPressure = "); Serial.println(p.z);
  */      
if (p.y < (TS_MINY-5)) stergere();
    // scale from 0->1023 to tft.width
    p.x = tft.width()-(map(p.x, TS_MINX, TS_MAXX, tft.width(), 0));
    p.y = tft.height()-(map(p.y, TS_MINY, TS_MAXY, tft.height(), 0));
  /*  
    Serial.print("("); Serial.print(p.x);
    Serial.print(", "); Serial.print(p.y);
    Serial.println(")");
  */  
    if (p.x < BOXSIZE) {
       oldcolor = currentcolor;

       if (p.y < BOXSIZE) { 
         currentcolor = RED; 
         tft.drawRect(0, 0, BOXSIZE, BOXSIZE, WHITE); 
//         text (currentcolor);
       } else if (p.y < BOXSIZE*2) {
         currentcolor = YELLOW;
         tft.drawRect(0, BOXSIZE, BOXSIZE, BOXSIZE, WHITE);
//         text (currentcolor);
       } else if (p.y < BOXSIZE*3) {
         currentcolor = GREEN;
         tft.drawRect(0, BOXSIZE*2, BOXSIZE, BOXSIZE, WHITE);
//         text (currentcolor);
       } else if (p.y < BOXSIZE*4) {
         currentcolor = CYAN;
         tft.drawRect(0, BOXSIZE*3, BOXSIZE, BOXSIZE, WHITE);       
//         text (currentcolor);
       } else if (p.y < BOXSIZE*5) {
         currentcolor = BLUE;
         tft.drawRect(0, BOXSIZE*4, BOXSIZE, BOXSIZE, WHITE);        
//         text (currentcolor);
       } else if (p.y < BOXSIZE*6) {
         currentcolor = MAGENTA;
         tft.drawRect(0,BOXSIZE*5, BOXSIZE, BOXSIZE, WHITE);        
//         text (currentcolor);
       } else if (p.y < BOXSIZE*7) {
         currentcolor = GRI;
         tft.drawRect(0,BOXSIZE*6, BOXSIZE, BOXSIZE, WHITE);        
//         text (currentcolor);
       } else if (p.y < BOXSIZE*8) {
         currentcolor = ROZ;
         tft.drawRect(0,BOXSIZE*7, BOXSIZE, BOXSIZE, WHITE);
         stergere();        
       }

text (currentcolor);
//cifre (currentcolor);
       if (oldcolor != currentcolor) {
          if (oldcolor == RED) tft.fillRect(0, 0, BOXSIZE, BOXSIZE, RED);
          if (oldcolor == YELLOW) tft.fillRect(0, BOXSIZE, BOXSIZE, BOXSIZE, YELLOW);
          if (oldcolor == GREEN) tft.fillRect(0, BOXSIZE*2, BOXSIZE, BOXSIZE, GREEN);
          if (oldcolor == CYAN) tft.fillRect(0, BOXSIZE*3, BOXSIZE, BOXSIZE, CYAN);
          if (oldcolor == BLUE) tft.fillRect(0, BOXSIZE*4, BOXSIZE, BOXSIZE, BLUE);
          if (oldcolor == MAGENTA) tft.fillRect(0, BOXSIZE*5, BOXSIZE, BOXSIZE, MAGENTA);
          if (oldcolor == GRI) tft.fillRect(0, BOXSIZE*6, BOXSIZE, BOXSIZE, GRI);
          if (oldcolor == ROZ) tft.fillRect(0, BOXSIZE*7, BOXSIZE, BOXSIZE, ROZ);
     cifre (currentcolor);  
     }
      
    }
   // if (((p.y-PENRADIUS) > BOXSIZE) && ((p.y+PENRADIUS) < tft.height())) {
/*
if (((p.y-PENRADIUS) > 5) && ((p.y+PENRADIUS) < tft.height())) {
   tft.fillCircle(p.x, p.y, PENRADIUS, currentcolor);
    }
*/
if (((p.x-PENRADIUS) > BOXSIZE) && ((p.x+PENRADIUS) < tft.width())) {
   tft.fillCircle(p.x, p.y, PENRADIUS, currentcolor);
    }

  }
}

void text (int culoare) 
{
tft.setRotation(3);
tft.setCursor(70, 80);
          tft.setTextColor(culoare);  tft.setTextSize(5);
 /*         tft.println("niq_ro");
          tft.setCursor(12, 130); tft.setTextSize(3);
          tft.println("www.tehnic.go.ro");
          tft.setCursor(20, 165); tft.setTextSize(2);
          tft.println("nicuflorica.blogspot.ro");
*/
          tft.setCursor(5, 220); tft.setTextSize(2);
          tft.println("arduinotehniq.blogspot.com");
tft.setRotation(0);
}

void cifre (int culoare)
{
// number for "buttons"
 tft.setRotation(3);
 tft.setTextColor(culoare);
 tft.setTextSize(3);
 tft.drawLine(0, 0, 40, 40, culoare);
 tft.drawLine(0, 40, 40, 0, culoare);
// tft.setCursor(15, 10);
// tft.println("1");
 tft.setCursor(55, 10);
 tft.println("1");
 tft.setCursor(95, 10);
 tft.println("2");
 tft.setCursor(135, 10);
 tft.println("3");
 tft.setCursor(175, 10);
 tft.println("4");
 tft.setCursor(215, 10);
 tft.println("5");
 tft.setCursor(255, 10);
 tft.println("6");
 tft.setCursor(295, 10);
 tft.println("7");
  
 tft.setRotation(0);
}

void stergere ()
{
      Serial.println("erase");
      // press the bottom of the screen to erase 
 //     tft.fillRect(0, BOXSIZE, tft.width(), tft.height()-BOXSIZE, BLACK);
   tft.fillRect(0, 0, 240, 320, BLACK);
   tft.setRotation(0);
  tft.fillRect(0, 0, BOXSIZE, BOXSIZE, RED);
  tft.fillRect(0, BOXSIZE, BOXSIZE, BOXSIZE, YELLOW);
  tft.fillRect(0, BOXSIZE*2, BOXSIZE, BOXSIZE, GREEN);
  tft.fillRect(0, BOXSIZE*3, BOXSIZE, BOXSIZE, CYAN);
  tft.fillRect(0, BOXSIZE*4, BOXSIZE, BOXSIZE, BLUE);
  tft.fillRect(0, BOXSIZE*5, BOXSIZE, BOXSIZE, MAGENTA);
  tft.fillRect(0, BOXSIZE*6, BOXSIZE, BOXSIZE, GRI);
  tft.fillRect(0, BOXSIZE*7, BOXSIZE, BOXSIZE,  ROZ);
//tft.fillRect(BOXSIZE, BOXSIZE, BOXSIZE, BOXSIZE, WHITE);
 
  tft.drawRect(0, 0, BOXSIZE, BOXSIZE, WHITE);
  currentcolor = RED;
     cifre (WHITE);  
    }
   De data aceasta, apare ecranul liber pentru desenare:
   Am facut si un filmulet numit afisaj color de 2,4" cu touch rezistiv si Arduino (4) care prezinta modul de comportare al programului si ce se poate face cu el:

marți, 27 august 2013

Afisajul folosit la telefoanele Nokia 5110/3310 si Arduino (IV)

   Fata de articolele anterioare, acum o sa prezint ce grafica interesanta se poate face folosind libraria GFX de la Adafruit pentru afisajele folosite la telefoanele Nokia 5110 sau 3310, care sunt controlate de driverul PCD8544, iar rezolutia grafica este de 84x48 pixeli.
   Schema de conectare, inclusiv adaptorul de tensiuni e acelasi:
   M-am gandit la un secundar de ceas...
iar porecla de pe net (niq_ro) sa fie afisat in partea de jos cand secundarul este in zona de sus, respectiv in partea de sus cand secundarul este in partea de jos:
   Pentru a desena ceva, trebuie sa stim ca dimensiunea utila este de 84 de puncte pe orizontala si 48 pe verticala, punctul notat cu (0,0) este in coltul din stanga sus, iar cel cu (83, 47) este in dreapta jos.
   In libraria grafica Adafruit_GFX, comanda pentru linie, este:
 display.drawLine(x0,y0, x1, y1, BLACK);  
   (x0,y0) sunt coordonatele punctului de inceput, iar (x1,y1) sunt coordonatele punctului de final al liniei.
   Pentru a desena un cerc, comanda este urmatoarea:
 display.drawCircle(x0, y0, r, BLACK);  
   (x0,y0) sunt coordonatele centrului cercului, iar r este raza cercului.
   Un prim filmulet, realizat cu un telefon Samsung, se numeste Adafruit GFX library + Nokia 5110 LCD + niq_ro's sketch (I):
ulterior am incercat si cu un telefon Nokia Asha 201, rezolutia fiind mult mai proasta... filmuletul se numeste Adafruit GFX library + Nokia 5110 LCD + niq_ro's sketch (II)
   Am folosit si un aparat foto FujiFilm S5700, filmuletul numindu-se Adafruit GFX library + Nokia 5110 LCD + niq_ro's sketch (III)
   Sketch-ul scris de mine, care "face" ce se vede in cele 3 filmulete este urmatorul:
 // original sketch by niq_ro, created in 7.aug.2013 at Santanandrei, Hunedoara  
 // using graphics library (GFX) from Adafruit  
 /*********************************************************************  
 This is an example sketch for our Monochrome Nokia 5110 LCD Displays  
  Pick one up today in the adafruit shop!  
  ------> http://www.adafruit.com/products/338  
 These displays use SPI to communicate, 4 or 5 pins are required to  
 interface  
 Adafruit invests time and resources providing this open source code,  
 please support Adafruit and open-source hardware by purchasing  
 products from Adafruit!  
 Written by Limor Fried/Ladyada for Adafruit Industries.  
 BSD license, check license.txt for more information  
 All text above, and the splash screen must be included in any redistribution  
 *********************************************************************/  
 #include <Adafruit_GFX.h>  
 // using library for LCD Nokia 5110/3310 type  
 #include <Adafruit_PCD8544.h>  
 // for my Nokia 5110 LCD from China  
 // see http://nicuflorica.blogspot.ro/2013/06/afisajul-folosit-la-telefoanele-nokia.html  
 // pin 3 - Serial clock out (SCLK)  
 // pin 4 - Serial data out (DIN)  
 // pin 5 - Data/Command select (D/C)  
 // pin 7 - LCD chip select (CS)  
 // pin 6 - LCD reset (RST)  
 // Adafruit_PCD8544 display = Adafruit_PCD8544(SCLK, DIN, DC, CS, RST);  
 Adafruit_PCD8544 display = Adafruit_PCD8544(3, 4, 5, 7, 6);  
 // center  
 int x0=84/2;  
 int y0=48/2;  
 // radius  
 int r=23;  
 // angle  
 int alfa=0;  
 void setup()  {  
  Serial.begin(9600);  
  display.begin();  
  // init done  
  // you can change the contrast around to adapt the display  
  // for the best viewing!  
  display.setContrast(50);  
  display.clearDisplay();  
  // text display tests  
  display.setTextSize(2);  
  display.setTextColor(BLACK);  
  display.setCursor(0,0);  
  display.println("tehnic. go.ro");  
  display.setTextSize(2);  
  display.setTextColor(WHITE, BLACK); // 'inverted' text  
  display.println(" niq_ro ");  
  display.display();  
  delay(2000);  
  display.clearDisplay();  
  // text display tests  
  display.setTextSize(1);  
  display.setTextColor(WHITE, BLACK);  
  display.setCursor(0,0);  
  display.println(" Adafruit GFX ");  
  display.setCursor(15,10);  
  display.setTextColor(WHITE, BLACK); // 'inverted' text  
  display.println(" library ");  
  display.setCursor(0,20);  
  display.setTextColor(BLACK); // 'inverted' text  
  display.println("--------------");  
  display.setCursor(0,30);  
  display.setTextColor(BLACK); // 'normal' text  
  display.println("niq_ro's progr");  
  display.setCursor(5,40);  
  display.setTextColor(BLACK); // 'normal' text  
  display.println("version 1.0");  
  display.display();  
  delay(2000);  
  display.clearDisplay();  
  // center  
 display.drawCircle(x0, y0, 1, BLACK);   
  // master circle  
 display.drawCircle(x0, y0, r, BLACK);  
  // line 1  
 display.drawLine(x0,y0, x0+r, y0, BLACK);  
 display.display();  
 delay(500);  
 // line 2  
 display.drawLine(x0,y0, x0, y0+r, BLACK);  
 display.display();  
 delay(500);  
  // line 3  
 display.drawLine(x0,y0, x0-r, y0, BLACK);  
 display.display();  
 delay(500);  
  // line 4  
 display.drawLine(x0,y0, x0, y0-r, BLACK);  
   display.display();  
 delay(2000);  
 display.clearDisplay();  
 }  
 void loop() {  
 // display a moving line on circle  
 for (int alfa=0; alfa<60; alfa+=1)  
 {  
   display.drawLine(x0,y0, x0+r*sin(6*alfa*2*3.14/360), y0-r*cos(6*alfa*2*3.14/360), BLACK);  
 display.drawCircle(x0, y0, r, BLACK);  
  display.setTextSize(1);  
  display.setTextColor(BLACK);  
  display.setCursor(0,0);  
  display.println(alfa);  
 if (alfa <15 || alfa>45)  
 {display.setCursor(25,30);}  
 else  
 {display.setCursor(25,10);}  
  display.println("niq_ro");  
  display.display();  
 delay(1000);  
 display.clearDisplay();  
 }   
 }  
   Ulterior, am mai adaugat si un minutar care se misca, apoi o "limba" de orar, pentru a anima am scazut timpul dintre miscari cu 2,5%...
- secundar:
 
- minutar:
 
- orar:
 
    Sketch-ul modificat este urmatorul:
 // initial version is created by niq_ro at Santuhalm (Deva)  
 // current version (ver. 1.1) is modified by niq_ro at Craiova (26.8.2013)  
 /*********************************************************************  
 This is an example sketch for our Monochrome Nokia 5110 LCD Displays  
  Pick one up today in the adafruit shop!  
  ------> http://www.adafruit.com/products/338  
 These displays use SPI to communicate, 4 or 5 pins are required to  
 interface  
 Adafruit invests time and resources providing this open source code,  
 please support Adafruit and open-source hardware by purchasing  
 products from Adafruit!  
 Written by Limor Fried/Ladyada for Adafruit Industries.  
 BSD license, check license.txt for more information  
 All text above, and the splash screen must be included in any redistribution  
 *********************************************************************/  
 #include <Adafruit_GFX.h>  
 #include <Adafruit_PCD8544.h>  
 // for my Nokia 5110 LCD from China  
 // see http://nicuflorica.blogspot.ro/2013/06/afisajul-folosit-la-telefoanele-nokia.html  
 // pin 3 - Serial clock out (SCLK)  
 // pin 4 - Serial data out (DIN)  
 // pin 5 - Data/Command select (D/C)  
 // pin 7 - LCD chip select (CS)  
 // pin 6 - LCD reset (RST)  
 // Adafruit_PCD8544 display = Adafruit_PCD8544(SCLK, DIN, DC, CS, RST);  
 Adafruit_PCD8544 display = Adafruit_PCD8544(3, 4, 5, 7, 6);  
 // center  
 int x0=84/2;  
 int y0=48/2;  
 // radius for circle  
 int r=23;  
 // angle  
 int alfa=0;  
 // lengh for minute hand (minutar)  
 int r1=20;  
 int r2=18;  
 // lengh for minute hand (orar)  
 int r3=15;  
 int r4=12;  
 // initial version is created by niq_ro at Santuhalm (Deva)  
 // current version (ver. 1.1) is modified by niq_ro at Craiova (26.8.2013)  
 void setup()  {  
  Serial.begin(9600);  
  display.begin();  
  // init done  
  // you can change the contrast around to adapt the display  
  // for the best viewing!  
  display.setContrast(50);  
  display.clearDisplay();  
  // text display tests  
  display.setTextSize(2);  
  display.setTextColor(BLACK);  
  display.setCursor(0,0);  
  display.println("tehnic. go.ro");  
  display.setTextSize(2);  
  display.setTextColor(WHITE, BLACK); // 'inverted' text  
  display.println(" niq_ro ");  
  display.display();  
  delay(2000);  
  display.clearDisplay();  
  // text display tests  
  display.setTextSize(1);  
  display.setTextColor(WHITE, BLACK);  
  display.setCursor(0,0);  
  display.println(" Adafruit GFX ");  
  display.setCursor(15,10);  
  display.setTextColor(WHITE, BLACK); // 'inverted' text  
  display.println(" library ");  
  display.setCursor(0,20);  
  display.setTextColor(BLACK); // 'inverted' text  
  display.println("--------------");  
  display.setCursor(0,30);  
  display.setTextColor(BLACK); // 'normal' text  
  display.println("niq_ro's progr");  
  display.setCursor(5,40);  
  display.setTextColor(BLACK); // 'normal' text  
  display.println("version 1.1");  
  display.display();  
  delay(2000);  
  display.clearDisplay();  
  // center  
 display.drawCircle(x0, y0, 1, BLACK);   
  // master circle  
 display.drawCircle(x0, y0, r, BLACK);  
  // line 1  
 display.drawLine(x0,y0, x0+r, y0, BLACK);  
 display.display();  
 delay(500);  
 // line 2  
 display.drawLine(x0,y0, x0, y0+r, BLACK);  
 display.display();  
 delay(500);  
  // line 3  
 display.drawLine(x0,y0, x0-r, y0, BLACK);  
 display.display();  
 delay(500);  
  // line 4  
 display.drawLine(x0,y0, x0, y0-r, BLACK);  
   display.display();  
 delay(2000);  
 display.clearDisplay();  
 }  
 void loop() {  
 // display a moving line on circle (as second on analog clock)  
 int t1 = 1000; // time beetwin moving second  
 for (int alfa=0; alfa<60; alfa+=1)  
 {  
 // display circle  
 display.drawCircle(x0, y0, r, BLACK);  
 // display a moving line as second  
 float alfa1 = 3.14*alfa/30; // convert ungle from degree in radian  
 display.drawLine(x0,y0, x0+r*sin(alfa1), y0-r*cos(alfa1), BLACK);  
 // display a text with my nickmane (niq_ro)  
  display.setTextSize(1);  
  display.setTextColor(BLACK);  
  display.setCursor(0,0);  
  display.println(alfa);  
 if (alfa <15 || alfa>45)  
 {display.setCursor(25,30);}  
 else  
 {display.setCursor(25,10);}  
  display.println("niq_ro");  
  display.display();  
 delay(t1);  
 t1 = t1 *0.975; // reduce the time between movements  
 display.clearDisplay();  
 }   
 // design a new clock just with a minute hand (minutar)  
 int t2 = 1000; // time beetwin moving minutar  
 for (int alfa=0; alfa<60; alfa+=1)  
 {  
 // display circle  
 display.drawCircle(x0, y0, r, BLACK);  
 // display a moving line as second  
 float alfa1 = 3.14*alfa/30; // convert ungle from degree in radian  
 float gama = 3.14/36; // value in radian for 5 degree   
 // display main line for minute hand  
 display.drawLine(x0,y0, x0+r1*sin(alfa1), y0-r1*cos(alfa1), BLACK);  
 // display outside line 1  
 display.drawLine(x0,y0, x0+r2*sin(alfa1-gama), y0-r2*cos(alfa1-gama), BLACK);  
 // display outside line 2  
 display.drawLine(x0,y0, x0+r2*sin(alfa1+gama), y0-r2*cos(alfa1+gama), BLACK);  
 // display outside line 3  
 display.drawLine(x0+r2*sin(alfa1+gama), y0-r2*cos(alfa1+gama), x0+r1*sin(alfa1), y0-r1*cos(alfa1), BLACK);  
 // display outside line 4  
 display.drawLine(x0+r2*sin(alfa1-gama), y0-r2*cos(alfa1-gama), x0+r1*sin(alfa1), y0-r1*cos(alfa1), BLACK);  
 // display a text with my nickmane (niq_ro)  
  display.setTextSize(1);  
  display.setTextColor(BLACK);  
  display.setCursor(0,0);  
  display.println(alfa);  
 if (alfa <15 || alfa>45)  
 {display.setCursor(25,30);}  
 else  
 {display.setCursor(25,10);}  
  display.println("niq_ro");  
  display.display();  
 delay(t2);  
 t2 = t2 *0.975; // reduce the time between movements  
 display.clearDisplay();  
 }   
 // design a new clock just with a hour hand (orar)  
 int t3 = 1000; // time beetwin moving minutar  
 for (int alfa=0; alfa<60; alfa+=1)  
 {  
 // display circle  
 display.drawCircle(x0, y0, r, BLACK);  
 // display a moving line as second  
 float alfa1 = 3.14*alfa/30; // convert ungle from degree in radian  
 float gama = 3.14/36; // value in radian for 5 degree   
 // display main line for minute hand  
 display.drawLine(x0,y0, x0+r3*sin(alfa1), y0-r3*cos(alfa1), BLACK);  
 // display outside line 1  
 display.drawLine(x0,y0, x0+r4*sin(alfa1-gama), y0-r4*cos(alfa1-gama), BLACK);  
 // display outside line 2  
 display.drawLine(x0,y0, x0+r4*sin(alfa1+gama), y0-r4*cos(alfa1+gama), BLACK);  
 // display outside line 3  
 display.drawLine(x0+r4*sin(alfa1+gama), y0-r4*cos(alfa1+gama), x0+r3*sin(alfa1), y0-r3*cos(alfa1), BLACK);  
 // display outside line 4  
 display.drawLine(x0+r4*sin(alfa1-gama), y0-r4*cos(alfa1-gama), x0+r3*sin(alfa1), y0-r3*cos(alfa1), BLACK);  
 // display a text with my nickmane (niq_ro)  
  display.setTextSize(1);  
  display.setTextColor(BLACK);  
  display.setCursor(0,0);  
  display.println(alfa);  
 if (alfa <15 || alfa>45)  
 {display.setCursor(25,30);}  
 else  
 {display.setCursor(25,10);}  
  display.println("niq_ro");  
  display.display();  
 delay(t3);  
 t3 = t3 *0.975; // reduce the time between movements  
 display.clearDisplay();  
 }   
 }  

    Filmuletul ce prezinta ce am scris mai sus se numeste Adafruit GFX library + Nokia 5110 LCD + niq_ro's sketch (IV)


    Aceasta grafica se poate folosi sa se afiseze un ceas analog cu date citite de pe un ceas de timp real (RTC) cu DS1307, de exemplu...

15.01.2014
   Deoarece intre timp afisajul a "decedat" din cauza contactului elastic prost intre cablaj si ecran, am achizitionat altul si l-am testat cu acest sketch, facand si filmuletul graphic test with my new Nokia 5110 LCD module