Se afișează postările cu eticheta ENC28J60. Afișați toate postările

miercuri, 25 martie 2015

Placa de retea cu ENC28J60 si Arduino Mega

   In articolul precedent numit Placa de retea cu ENC28J60 si Arduino am prezentat pe scurt cum am conectat eu placa de retea la unArduino Uno... avandu-l ocupat pentru "teste de anduranta", am conectat o alta placa cu ENC28J60 la o placa Arduino Mega si incarcand sketch-ul am avut surpriza sa constat ca nu functioneaza.. chiar daca am schimbat legaturile pe pinii dedicati: MISO la pin 50, MOSI la pin 51, SCK la 52 si SS/CS la 53, cum e prezentat si in articolul How to use enc28j60 ethernet shield with Arduino Mega 2560
   Acolo se prezinta o modificare, pentru fortarea pinului CS/SS la pin 53.
1
2
3
4
5
6
7
8
9
10
...
if (ether.begin(sizeof Ethernet::buffer, mymac, 53) == 0)
  {
    Serial.println(P("Failed to access Ethernet controller"));
  }
  else
  {
     Serial.println(P("Ethernet is fine and up"));
  }
...
   Pentru a functiona, in loc de litera P trebuie pus F.
   De asemenea, si in libraria Ethercard se mentioneaza acest lucru si prezinta comanda de trecerea a pinului 8 in 53:
VCC -   3.3V
GND -    GND
SCK - Pin 52
SO  - Pin 50
SI  - Pin 51
CS  - Pin 53 # Selectable with the ether.begin() function
# The default CS pin defaults to 8, so you have to set it on a mega:
ether.begin(sizeof Ethernet::buffer, mymac, 53)
   Din pacate, la teste nu reuseam sa-l fac functional si renuntasem... dar Luci, un coleg mai rabdator, a cautat si el pe net si a dat de filmuletul Arduino EthernetShield ENC28J60 Configuration - Parte1
   Inlocuind partea de mutare a comenzii de pe pinul 8 (de la Arduino Uno) pe 53 (la Arduino Mega), sketch-ul din articolul precedent arata asa:
//original sketch from http://www.lucadentella.it/2012/11/10/enc28j60-e-arduino-9/
// adapted sketch from http://nicuflorica.blogspot.ro/
#include <EtherCard.h>
#include <avr/wdt.h>
#define RELAY_PIN 2

// ethernet interface mac address, must be unique on the LAN
static byte mymac[] = { 0x74,0x69,0x69,0x2D,0x30,0x31 };
static byte myip[] = { 192,168,0,199 };

byte Ethernet::buffer[500];
BufferFiller bfill;

char* on  = "ON";
char* off = "OFF";

boolean relayStatus;
char* relayLabel;
char* linkLabel;

void setup () {
 
 Serial.begin(9600);
 // 1st good version from https://www.youtube.com/watch?v=d2toibPesS4
/* if (ether.begin(sizeof Ethernet::buffer, mymac, 53) == 0)
    Serial.println(F("Failed to access Ethernet controller"));  
*/

 // 2nd good version from http://en.code-bude.net/2013/06/22/how-to-use-enc28j60-ethernet-shield-with-arduino-mega-2560/ 
if (ether.begin(sizeof Ethernet::buffer, mymac, 53) == 0)
  {
    Serial.println(F("Failed to access Ethernet controller"));
  }
  else
  {
     Serial.println(F("Ethernet is fine and up"));
  }

ether.staticSetup(myip);  // put static IP in local network
 
  pinMode(RELAY_PIN, OUTPUT);
  digitalWrite(RELAY_PIN, LOW);  
  relayStatus = false;
  relayLabel = off;
  linkLabel = on;
  
  wdt_enable(WDTO_1S);//This start the watchdog timer with a 1 second timeout
}
  
void loop() {
wdt_reset();//This resets the timer

long t = millis() / 1000;
  word h = t / 3600;
  byte m = (t / 60) % 60;
  byte s = t % 60; 

  word len = ether.packetReceive();
  word pos = ether.packetLoop(len);
  
  if(pos) {
        
    if(strstr((char *)Ethernet::buffer + pos, "GET /?ON") != 0) {
      relayStatus = true;
      relayLabel = on;
      linkLabel = off;
    } else if(strstr((char *)Ethernet::buffer + pos, "GET /?OFF") != 0) {
      relayStatus = false;
      relayLabel = off;
      linkLabel = on;
    }
    digitalWrite(RELAY_PIN, relayStatus); 
  
    BufferFiller bfill = ether.tcpOffset();
    bfill.emit_p(PSTR("HTTP/1.0 200 OK\r\n"
    "Content-Type: text/html\r\nPragma: no-cache\r\n\r\n"
    // from http://fabiotomio.com.br/blog/2014/05/07/arduino-modulo-ethernet-enc28j60/
 /*     "Content-Type: text/html\r\n"
      "Refresh: 5\r\n"
      "\r\n"
  */    
     
      "<html><head><meta name='viewport' content='width=200px'/></head><body>"
      "<div style='position:absolute;width:200px;height:200px;top:50%;left:50%;margin:-100px 0 0 -100px'>"
      "<div style='font:bold 14px verdana;text-align:center'>Relay is $S</div>"
      "<br><div style='text-align:center'>"
      "<a href='/?$S'><img src='http://www.lucadentella.it/files/bt_$S.png'></a>"
      ), relayLabel, linkLabel, linkLabel);
bfill.emit_p(PSTR("<p>"
"<h2>$D$D:$D$D:$D$D</h2>"),
h/10, h%10, m/10, m%10, s/10, s%10);
 bfill.emit_p(PSTR("</body></html>"));   

      ether.httpServerReply(bfill.position());
    }
}
// note: for watchdog see https://hackaday.io/project/3731-open-z3zzvw3/log/12362-the-brain-of-the-thingy
   In sketch am lasat si varianta din film, doar ca "comentata"...

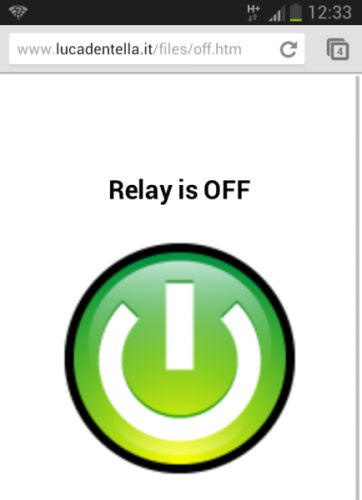
   La adresa locala data de mine, 192.168.0.199 gasim 2 situatii:
 
   PS: Pentru a nu avea probleme, trebuie impus IP-ul prin comanda ether.staticSetup(myip); dupa cum se vede in imaginea urmatoare:
   PS2: Dupa cateva ore de teste, am observat ca este stabila pagina doar daca se trimit comenzi din reteaua locala, prin cablu, in cazul folosiri unui periferic (laptop, telefon, tableta) conectat prin "uairles" atunci ea se blocheaza. Solutia gasita de mine pentru a elimia aceasta ploblerma, este acea de a folosi pinul 8, ca in cazul placii Arduino Uno si renuntare ala "portarea" pinului 8 la 53...

   In montaj eu am mai pus si pinul de RESET...
  Sketch-ul devine simplu:
//original sketch from http://www.lucadentella.it/2012/11/10/enc28j60-e-arduino-9/
// adapted sketch by niq_ro from http://nicuflorica.blogspot.ro/
// direct link: http://nicuflorica.blogspot.ro/2015/03/placa-de-retea-cu-enc28j60-si-arduino_25.html
#include <EtherCard.h>
#include <avr/wdt.h> // for watchdog see https://hackaday.io/project/3731-open-z3zzvw3/log/12362-the-brain-of-the-thingy
#define RELAY_PIN 2

// ethernet interface mac address, must be unique on the LAN
static byte mymac[] = { 0x74,0x69,0x69,0x2D,0x30,0x31 };
static byte myip[] = { 192,168,0,199 };
static byte gwip[] = {192,168,0,1};

byte Ethernet::buffer[500];
BufferFiller bfill;

char* on  = "ON";
char* off = "OFF";

boolean relayStatus;
char* relayLabel;
char* linkLabel;

void setup () {
 Serial.begin(9600);
 if(ether.begin(sizeof Ethernet::buffer, mymac) == 0)
    Serial.println( "Failed to access Ethernet controller");
  else
    Serial.println("Ethernet controller initialized");
 if (!ether.dhcpSetup())
    Serial.println("Failed to get configuration from DHCP");
  if(!ether.staticSetup(myip))
    Serial.println("Failed to set IP address");
 ether.printIp("My IP: ", ether.myip);
//   ether.printIp("Netmask: ", ether.mymask);
  ether.printIp("GW IP: ", ether.gwip);
  ether.printIp("DNS IP: ", ether.dnsip);

  pinMode(RELAY_PIN, OUTPUT);
  digitalWrite(RELAY_PIN, LOW);  
  relayStatus = false;
  relayLabel = off;
  linkLabel = on;
  
  wdt_enable(WDTO_1S);//This start the watchdog timer with a 1 second timeout
}
  
void loop() {
wdt_reset();//This resets the timer

long t = millis() / 1000;
  word h = t / 3600;
  byte m = (t / 60) % 60;
  byte s = t % 60; 

  word len = ether.packetReceive();
  word pos = ether.packetLoop(len);
  
  if(pos) {
        
    if(strstr((char *)Ethernet::buffer + pos, "GET /?ON") != 0) {
      relayStatus = true;
      relayLabel = on;
      linkLabel = off;
    } else if(strstr((char *)Ethernet::buffer + pos, "GET /?OFF") != 0) {
      relayStatus = false;
      relayLabel = off;
      linkLabel = on;
    }
    digitalWrite(RELAY_PIN, relayStatus); 
  
    BufferFiller bfill = ether.tcpOffset();
    bfill.emit_p(PSTR("HTTP/1.0 200 OK\r\n"
    "Content-Type: text/html\r\nPragma: no-cache\r\n\r\n"
    // from http://fabiotomio.com.br/blog/2014/05/07/arduino-modulo-ethernet-enc28j60/
 /*     "Content-Type: text/html\r\n"
      "Refresh: 5\r\n"
      "\r\n"
  */    
      "<html><head><meta name='viewport' content='width=200px'/></head><body>"
      "<div style='position:absolute;width:200px;height:200px;top:50%;left:50%;margin:-100px 0 0 -100px'>"
      "<div style='font:bold 14px verdana;text-align:center'>Relay is $S</div>"
      "<br><div style='text-align:center'>"
      "<a href='/?$S'><img src='http://www.lucadentella.it/files/bt_$S.png'></a>"
      ), relayLabel, linkLabel, linkLabel);
bfill.emit_p(PSTR("<p>"
"<h2>$D$D:$D$D:$D$D</h2>"),
h/10, h%10, m/10, m%10, s/10, s%10);
 bfill.emit_p(PSTR("</body></html>"));   

      ether.httpServerReply(bfill.position());
    }
}

miercuri, 18 martie 2015

Placa de retea cu ENC28J60 si Arduino

   Am testat si o placa de retea cu cipset ENC28J60. Pentru ea exista mai multe librarii pentru conectarea la Arduino, un rezumat l-am gasit in articolul Web-Enable your Arduino with an Arduino ENC28J60 Ethernet shield …
   Eu am ales libraria Ethercard, care se conecteaza diferit de celelalte, dupa cum e prezentat si in articolul mentionat mai sus:
   Am gasit, cu ajutorul lui Alex, un prieten care am reusit sa-l "virusez" cu Arduino, site-ul http://www.lucadentella.it, care are mai multe articole cu aceasta placa de retea, iar unul din ele este enc28J60 and Arduino (9), care prezinta modul de comanda al unui releu dintr-un buton virtual:
  Dupa mai multe zile de teste am constatat ca se blocheaza uneori dupa cateva deci de minute, alteori dupa zeci de ore, si cautand solutii, am dat de articolul An over engineered way to unlock a door in care se mentioneaza folosirea catelului de pasa (watchdog), care poate debloca microcontrolerul in caz de functionare anormala..
   Cateva poze cu de la testelele in care am pus partea de watchdog si de contorizarea a timpului cat functioneaza, deoarece la autoresetare se reia de la zero:
   Am facut un filmulet numit LED controlat prin retea sau wireless (5):
   Sketch-ul derivat din cel de pe site-l http://www.lucadentella.it/ la care am pus partea de contorizarea din exemplul RBBB_server al librariei Ethercard
//original sketch from http://www.lucadentella.it/2012/11/10/enc28j60-e-arduino-9/
// adapted sketch from http://nicuflorica.blogspot.ro/
#include <EtherCard.h>
#include <avr/wdt.h>
#define RELAY_PIN 2

//static byte mymac[]  = {0xDD,0xDD,0xDD,0x00,0x00,0x01};
static byte mymac[] = {0x74,0x69,0x69,0x2D,0x30,0x69};
static byte myip[]   = {192,168,0,251};
static byte gwip[] = {192,168,0,1};
byte Ethernet::buffer[700];
#define STATIC 0  // set to 1 to disable DHCP (adjust myip/gwip values below)

char* on  = "ON";
char* off = "OFF";

boolean relayStatus;
char* relayLabel;
char* linkLabel;

void setup () {
 
  Serial.begin(9600);
  Serial.println("WebRelay Demo");

//  if(!ether.begin(sizeof Ethernet::buffer, mymac, 10))
 if(ether.begin(sizeof Ethernet::buffer, mymac) == 0)
    Serial.println( "Failed to access Ethernet controller");
  else
    Serial.println("Ethernet controller initialized");

 if (!ether.dhcpSetup())
    Serial.println("Failed to get configuration from DHCP");
 // if(!ether.staticSetup(myip))
    Serial.println("Failed to set IP address");
 ether.printIp("My IP: ", ether.myip);
  // ether.printIp("Netmask: ", ether.mymask);
  ether.printIp("GW IP: ", ether.gwip);
  ether.printIp("DNS IP: ", ether.dnsip);
  
  pinMode(RELAY_PIN, OUTPUT);
  digitalWrite(RELAY_PIN, LOW);  
  relayStatus = false;
  relayLabel = off;
  linkLabel = on;
  
  wdt_enable(WDTO_1S);//This start the watchdog timer with a 1 second timeout
}
  
void loop() {
wdt_reset();//This resets the timer

long t = millis() / 1000;
  word h = t / 3600;
  byte m = (t / 60) % 60;
  byte s = t % 60; 

  word len = ether.packetReceive();
  word pos = ether.packetLoop(len);
  
  if(pos) {
        
    if(strstr((char *)Ethernet::buffer + pos, "GET /?ON") != 0) {
      relayStatus = true;
      relayLabel = on;
      linkLabel = off;
    } else if(strstr((char *)Ethernet::buffer + pos, "GET /?OFF") != 0) {
      relayStatus = false;
      relayLabel = off;
      linkLabel = on;
    }
    digitalWrite(RELAY_PIN, relayStatus); 
  
    BufferFiller bfill = ether.tcpOffset();
    bfill.emit_p(PSTR("HTTP/1.0 200 OK\r\n"
    "Content-Type: text/html\r\nPragma: no-cache\r\n\r\n"
    // from http://fabiotomio.com.br/blog/2014/05/07/arduino-modulo-ethernet-enc28j60/
 /*     "Content-Type: text/html\r\n"
      "Refresh: 5\r\n"
      "\r\n"
  */    
     
      "<html><head><meta name='viewport' content='width=200px'/></head><body>"
      "<div style='position:absolute;width:200px;height:200px;top:50%;left:50%;margin:-100px 0 0 -100px'>"
      "<div style='font:bold 14px verdana;text-align:center'>Relay is $S</div>"
      "<br><div style='text-align:center'>"
      "<a href='/?$S'><img src='http://www.lucadentella.it/files/bt_$S.png'></a>"
//      "<h2>$D$D:$D$D:$D$D</h2>"
//      "</div></div></body></html>"
//      "</body></html>"
      ), relayLabel, linkLabel, linkLabel);
//  ), relayLabel, linkLabel, linkLabel, h/10, h%10, m/10, m%10, s/10, s%10);

bfill.emit_p(PSTR("<p>"
"<h2>$D$D:$D$D:$D$D</h2>"),
h/10, h%10, m/10, m%10, s/10, s%10);
//bfill.emit_p(PSTR(" ore de la pornire placa Arduino (actualizeaza la actionare buton)."));
 bfill.emit_p(PSTR("</body></html>"));   


      ether.httpServerReply(bfill.position());
    }
}

// note: for watchdog see https://hackaday.io/project/3731-open-z3zzvw3/log/12362-the-brain-of-the-thingy

   Pe ecranul de monitorizare vom gasi datele necesare pentru a putea accesa pagina:
   Pe site-ul italian e o coletie de articole numite ENC28J60-Arduino in care se gasesc, oana acum 20 de articole cu aceasta placa de retea... inclusiv comanda cu parola...

19.03.2015
   Cu ajutorul datelor de pe site-ul italian si cu informatii de la Alex si de la Andrei am pus si parola:
   Din pacate, cand accesez pagina de pe mai multe periferice (calculatoare, telefoane legate in retea prin cablu sau "uairles") se mai blocheaza...
   Am facut un filmulet numit LED controlat prin retea sau wireless (6) in care se vede cum reactioneaza pagina web in functie de parola introdusa corect sau gresit, in plus, informatiile sunt actualizate la cca. 30 secunde:
02.02.2016
   La adresa http://www.ec.in.th/index.php?route=cms/article&article_id=41 este o schema foarte frumos prezentata de conectare la o placa Arduino a unui placi de retea cu ENC28J60:
03.02.2016
   Am facut inca 2 filmulte, incarcand sketch-ul din articol, punand si un LED portocaliu de 10mm din generatia veche a Microelectronica la pinul A0: